gbpig is the German Biometric Passport Image Generator. It was originally some GIMP templates, but is now a Python script that takes any image along with the following metadata in JSON format:
- Y-coordinate of the chin
- Y-coordinate of the top of head
- Coordinate of the left eye
- Coordinate of the right eye
- Coordinate of tip of nose
These, along with the source image, are fed into the script which generates a printable version.
It has been generated from a template that was created from the orginal Bundesdruckerei PDFs and that works for both adults and children under the age of 10. Original documentation can be found here:
Note: the following guide is tailored for ubuntu users. Other distros or OSes might have different procedures, which you can follow on the official pages for each project.
- Download or clone this github repo. Navigate into the repo folder and make sure you pull the submodule geo with the following command in the terminal.
git submodule update --init- Install GIMP or any image processing tool for your distribution.
sudo apt-get install gimp #ubuntu- Make sure to install the following packages that are important for usage with the Imagemagick tool (i.e) some of the important dependencies.
sudo apt install libjpeg-dev libpng-dev libtiff-dev libfreetype6-dev libltdl-dev -y- Next let's install Imagemagick 7.1.1-45(latest at this time) by compiling from source. Use these commands below or follow the offical guide✅
git clone --depth 1 --branch 7.1.1-45 https://github.com/ImageMagick/ImageMagick.git ImageMagick-7.1.1
cd ImageMagick-7.1.1
./configure --with-modules
make -j8
sudo make install- Download or clone this github repo. Navigate into the repo folder and make sure you pull the submodule geo with the following command in the Command Prompt.
git.exe submodule update --init-
Download the latest ImageMagick Windows Binary Release (e.g., 'ImageMagick-7.1.1-47-Q16-HDRI-x64-dll.exe') from the official download page.
-
During installation, make sure to check the option "Add application directory to your system PATH".
If you forgot, you can add it manually:- Press
Win + R, typesysdm.cpl, go to Advanced > Environment Variables - Under System variables, find
Path, click Edit, and add your ImageMagick application directory, e.g.:C:\Program Files\ImageMagick-7.1.1-Q16\
- Press
-
Use
python.exe gbpiginstead of./gbpigin the following usage instructions. For example:python.exe gbpig example.json example_print_me.jpg
Create the JSON file:
Open the image with GIMP or any image processing tool. Use the crosshair to find the coordinates of the POIs.
{
    "image": {
        "filename": "my_pretty_image.jpg"
    },
    "pois": {
        "chin_y": 2123,
        "head_y": 773,
        "left_eye": [ 3086, 1436 ],
        "right_eye": [ 3428, 1431 ],
        "nose": [ 3268, 1683 ]
    }
}
And then:
$ ./gbpig example.json example_print_me.jpg
If you want to use the parameters for children, do:
$ ./gbpig -t child example.json example_print_me.jpg
All parameters are shown on the help page:
$ ./gbpig --help
usage: gbpig [-h] [-r dpi] [-t {adult,child}] [-b mm] [-l mm] [-W mm] [-H mm]
             [-c] [-v]
             json_input_filename image_output_filename

Generate a biometric passport photo.

positional arguments:
  json_input_filename   JSON file which describes the source image along with
                        points of interest (POIs) in pixel coordinates.
  image_output_filename
                        Output image file.

optional arguments:
  -h, --help            show this help message and exit
  -r dpi, --resolution dpi
                        Output image resolution in dpi. Defaults to 300 dpi.
  -t {adult,child}, --picture-type {adult,child}
                        Give the picture type. Can be any of adult, child,
                        defaults to adult.
  -b mm, --border-size mm
                        Specifies the dimension around the image that is
                        included (in mm). Defaults to 5.0 mm.
  -l mm, --line-size mm
                        Specifies the length of cutting lines in mm. Defaults
                        to 2.0 mm.
  -W mm, --canvas-width mm
                        Specifies the output canvas width in mm. Defaults to
                        100.0 mm.
  -H mm, --canvas-height mm
                        Specifies the output canvas height in mm. Defaults to
                        150.0 mm.
  -c, --check           Allows you to check the classification was correct by
                        creating additional help lines.
  -v, --verbose         Increases verbosity. Can be specified multiple times
                        to increase.
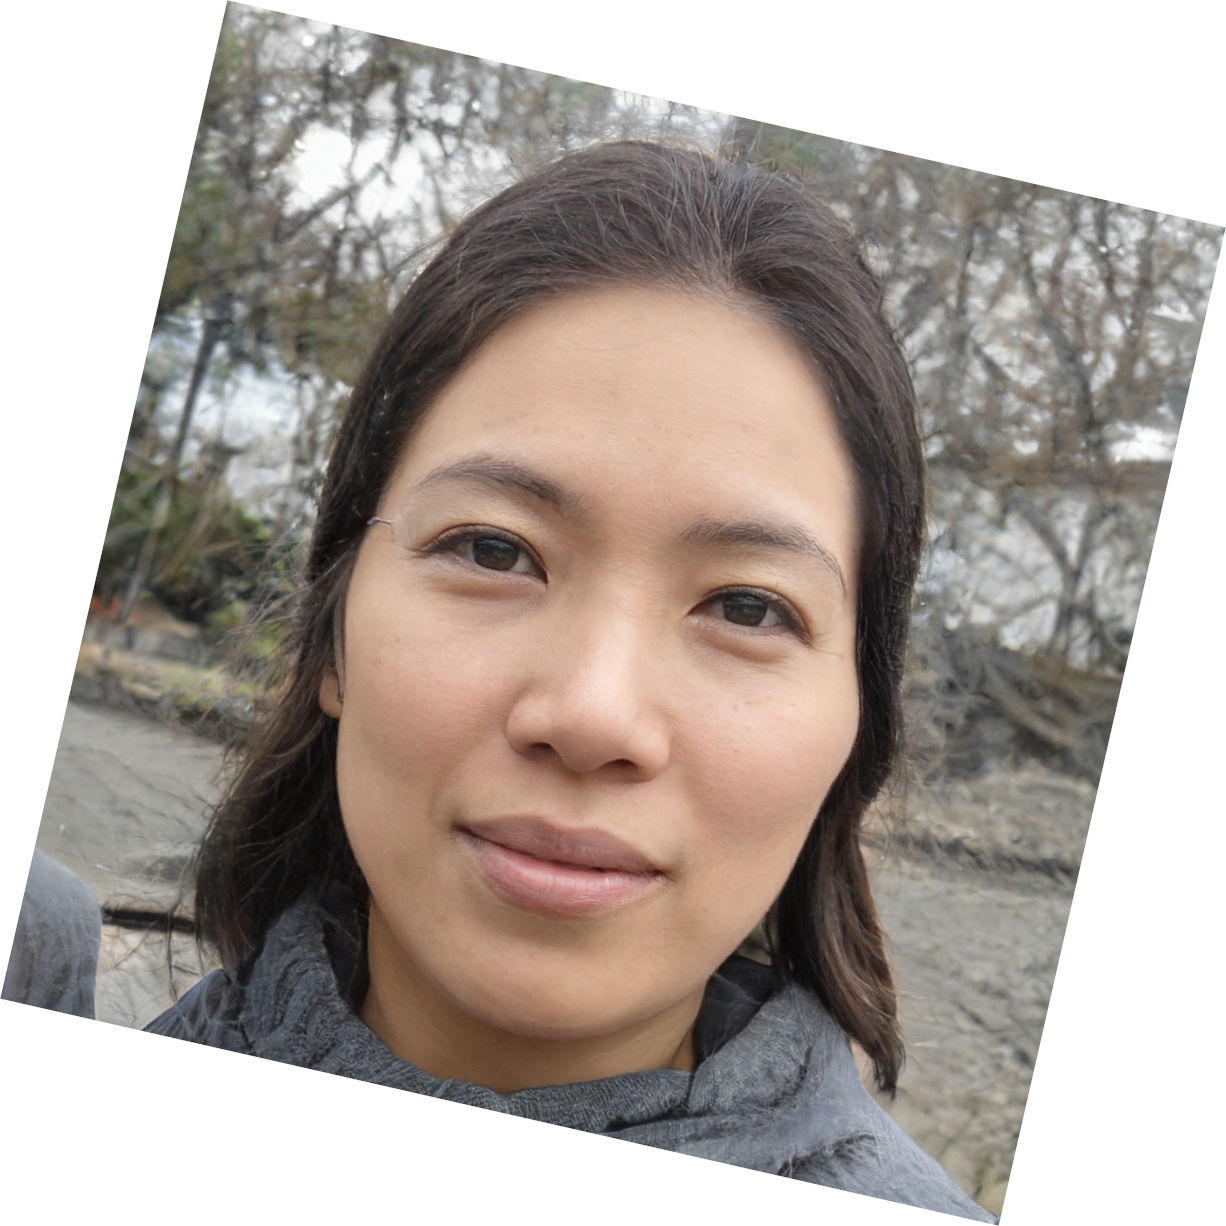
Here is an image that is fed as a source. It is deliberately rotated. The person on this image does not exist.
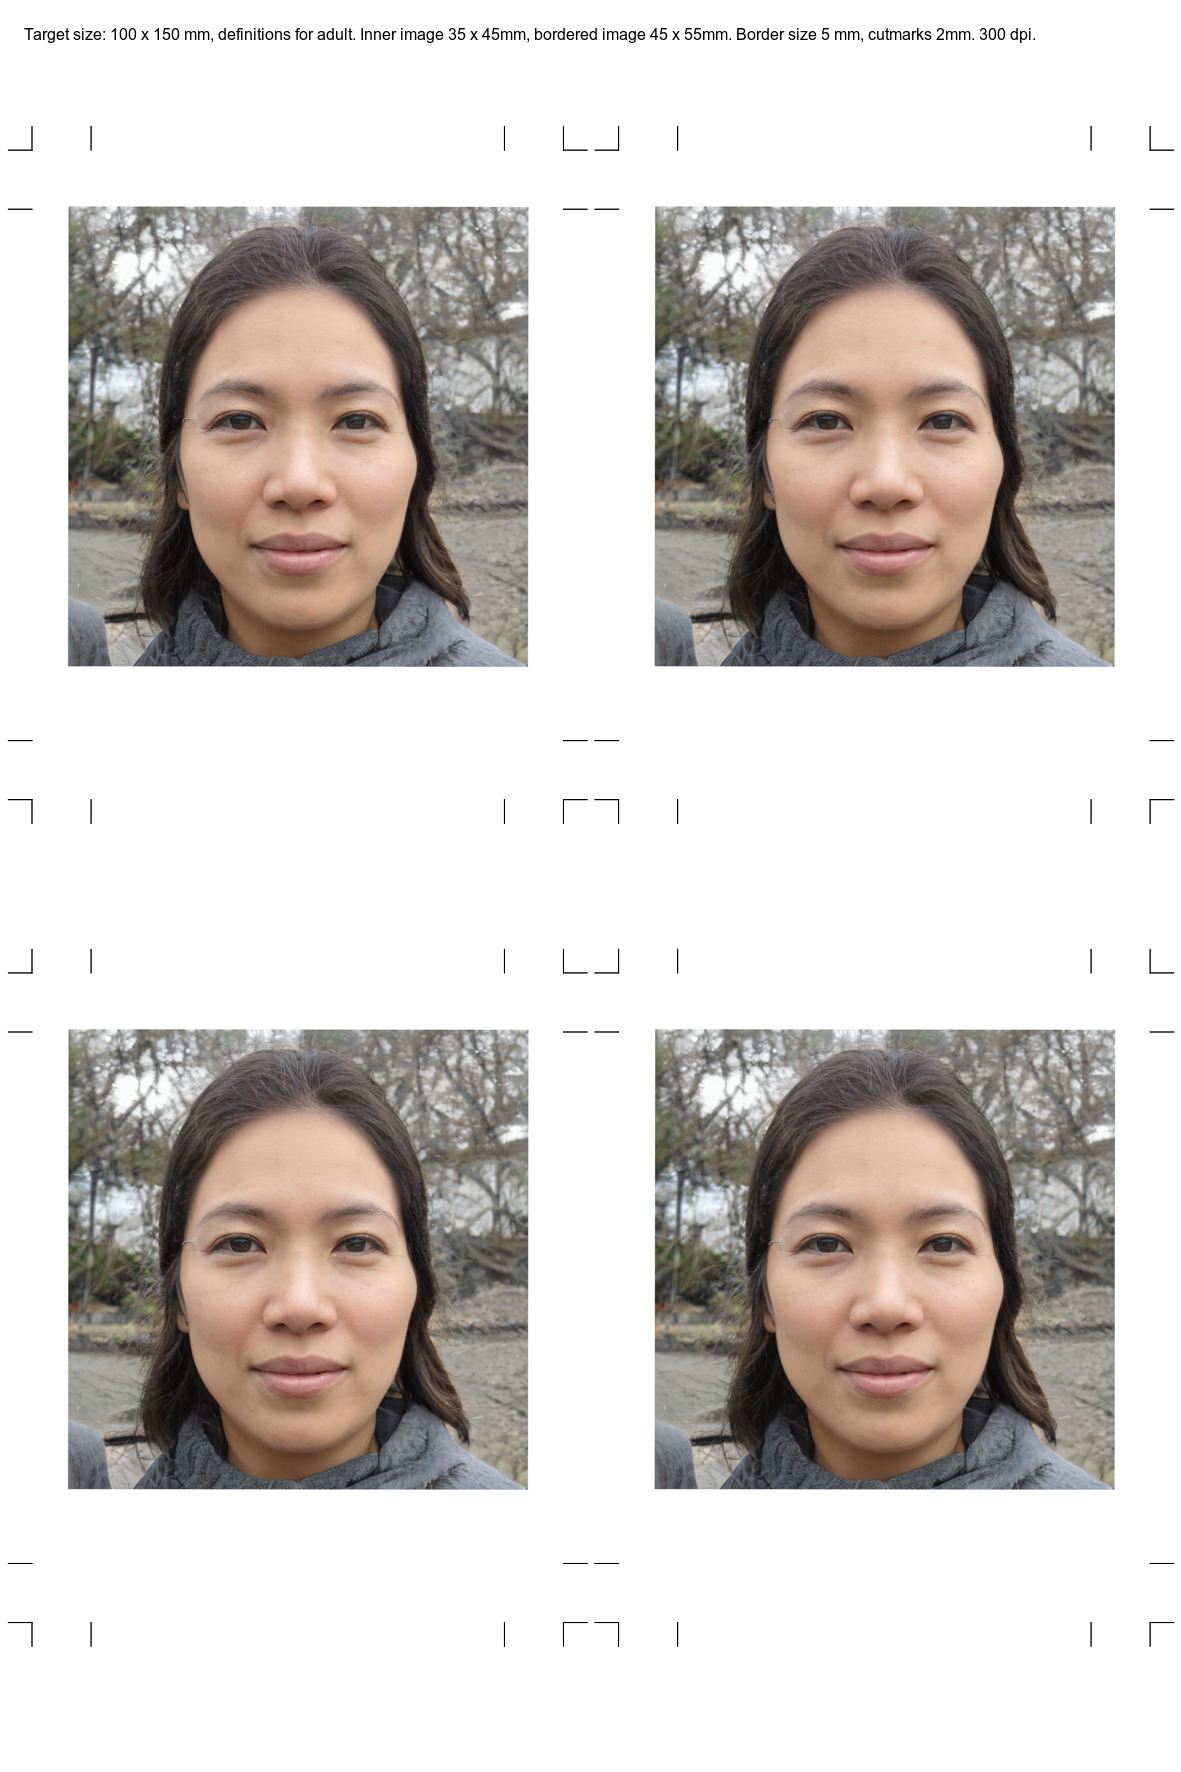
When a 100 x 150mm image is genearted from this, this is the output:
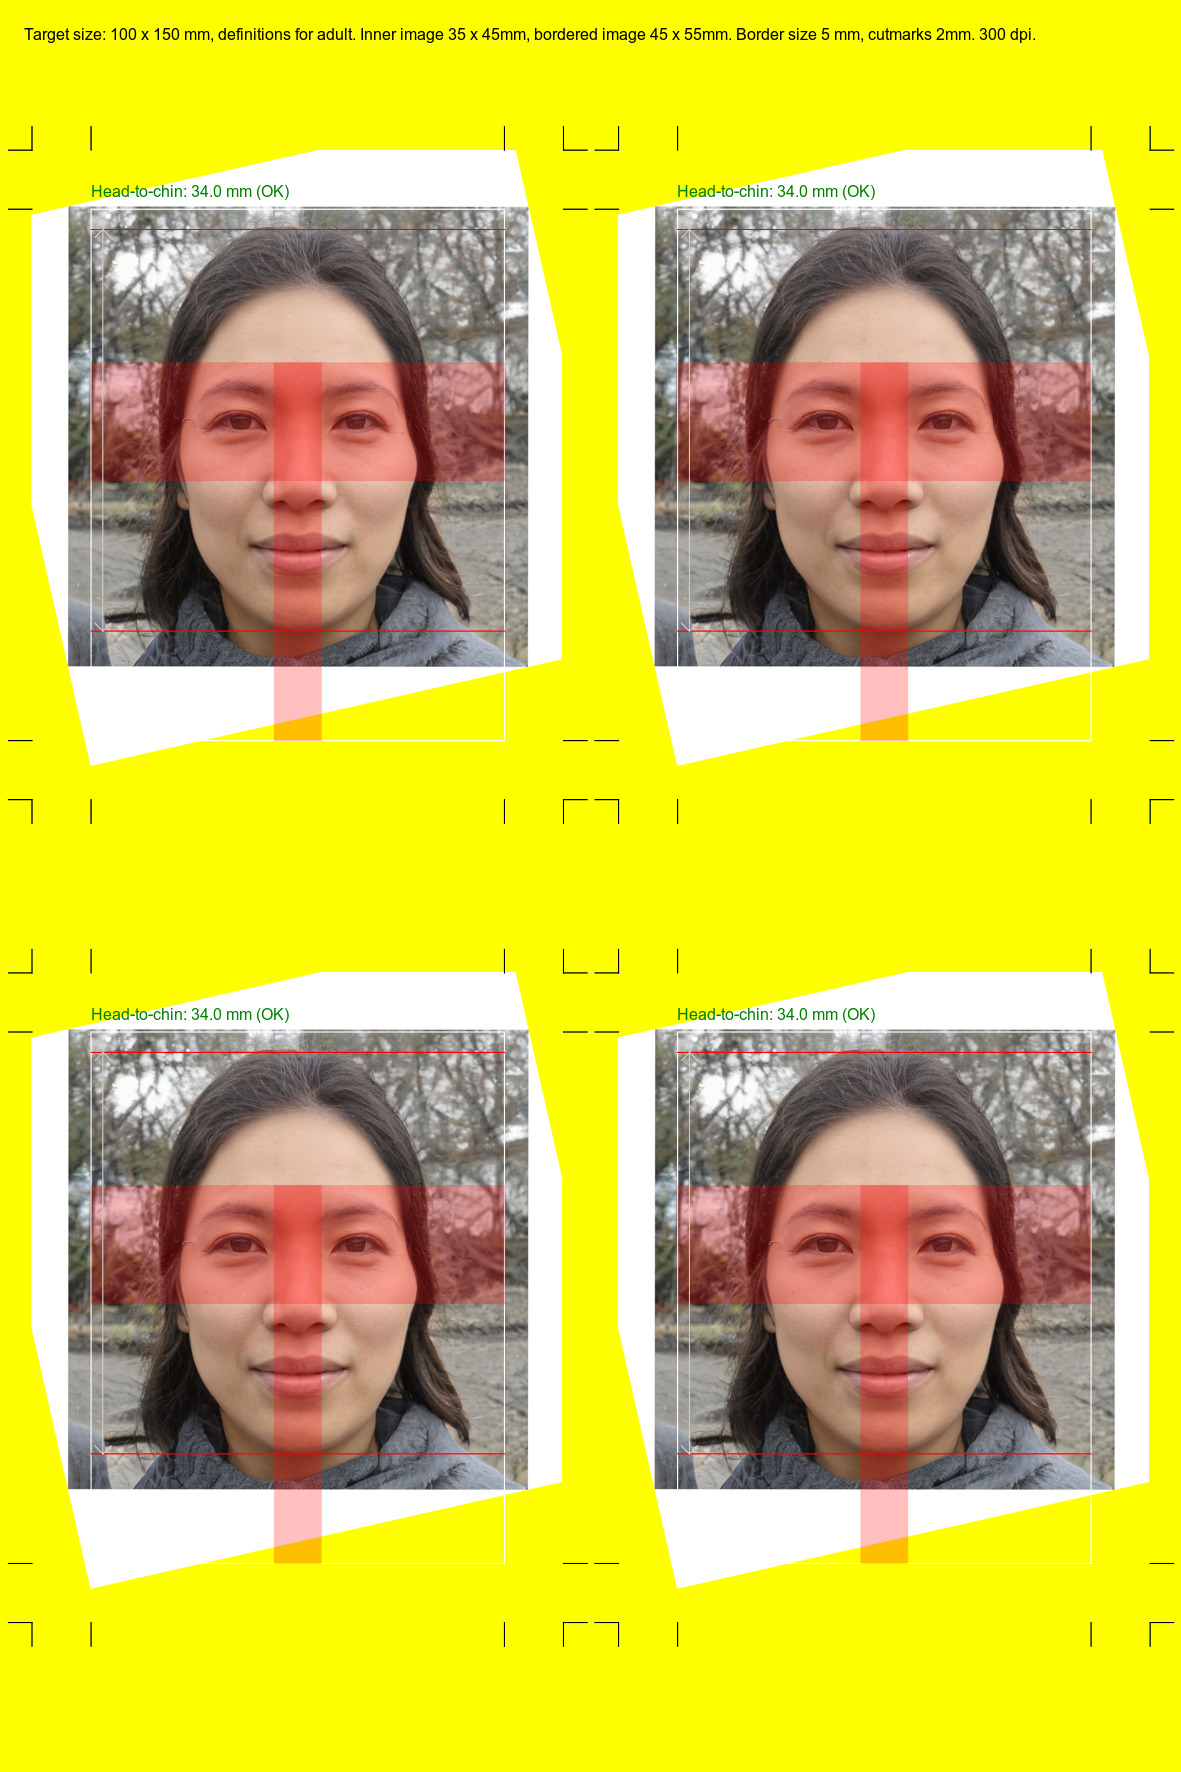
To check validity of results, you can specify the --check command line
option, in which case this is the output:
GNU GPL-3.