A step-by-step guide to install and run Metasploitable 2 on Mac with Apple Silicon (M1, M2, M3, etc.) using UTM. Ideal for ethical hacking, penetration testing, and cybersecurity students.
📌 Note: As of now, only UTM reliably supports running Metasploitable 2 on Macs with Apple Silicon (M1, M2, M3, etc.). VirtualBox and VMware do not support x86 virtual machines on Apple Silicon natively.
🗓 Updated: July 24, 2025
- What is Metasploitable 2?
- Why UTM for Apple Silicon?
- Requirements
- Download Metasploitable 2
- Installation Steps
- Author
Metasploitable 2 is a deliberately vulnerable Linux-based virtual machine created by Rapid7 for penetration testing practice. It's widely used in cybersecurity labs.
Apple Silicon (M1, M2, M3) doesn’t natively support x86 VMs in VirtualBox or VMware. UTM is the best free and open-source virtualization tool for running x86 operating systems on Apple Silicon.
- ✅ Mac with Apple Silicon (M1, M2, M3…)
- ✅ UTM
- ✅ Metasploitable 2
.isoor.vmdkfile (download below)
- Go to official source
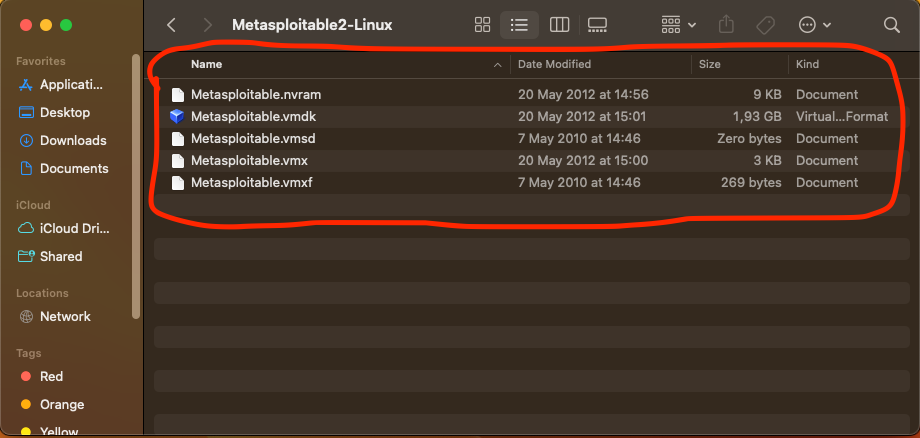
- Download the Metasploitable2.vmdk.zip
- Extract the
metasploitable-linux-2.0.0.zipfile
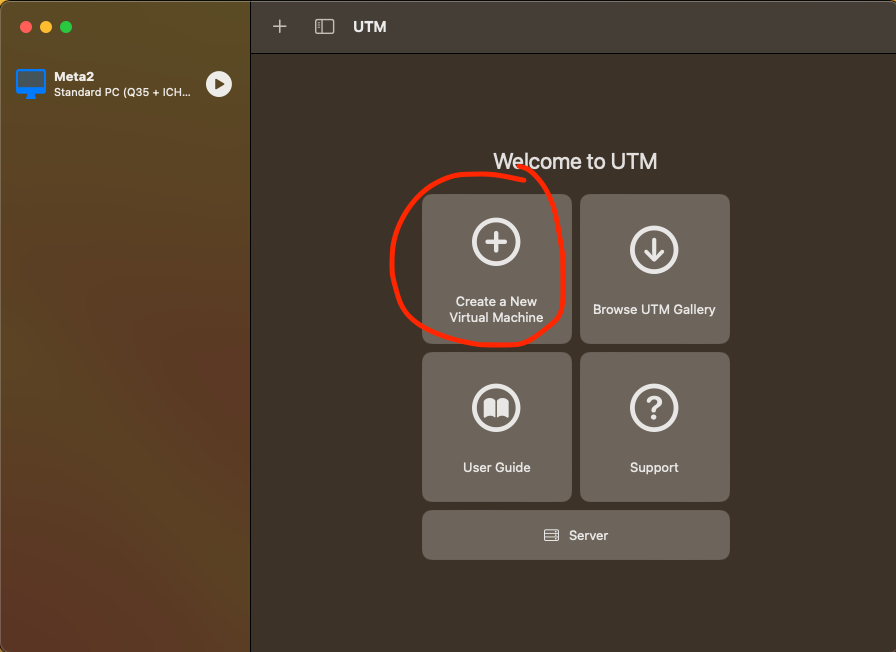
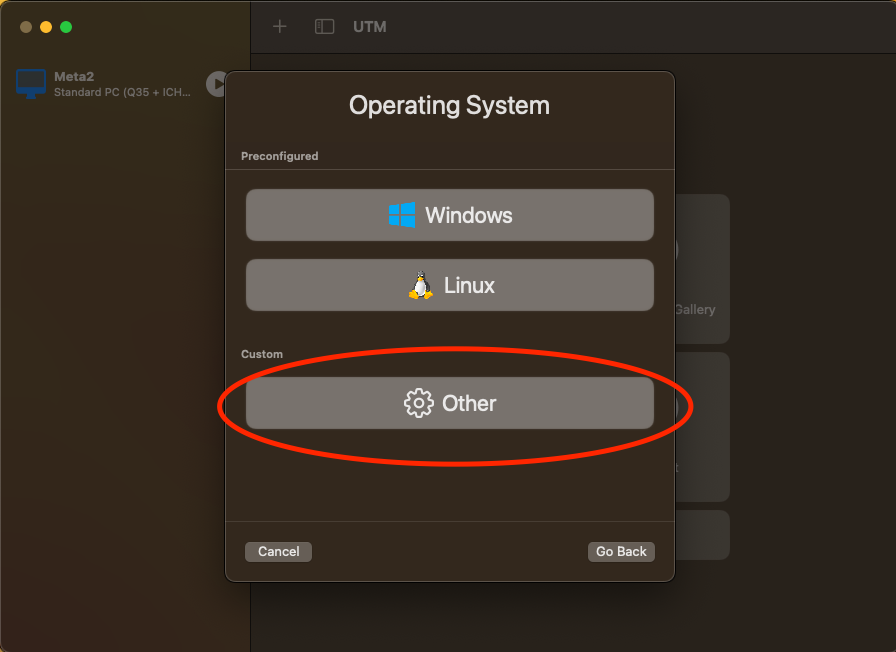
- Click Create a New Virtual Machine
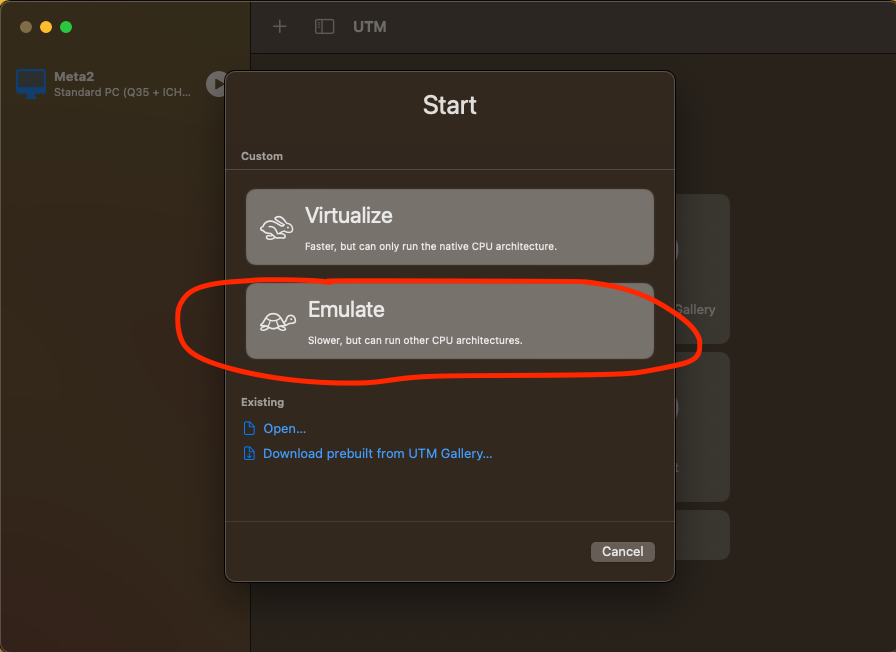
- Select Emulate
- Select Other
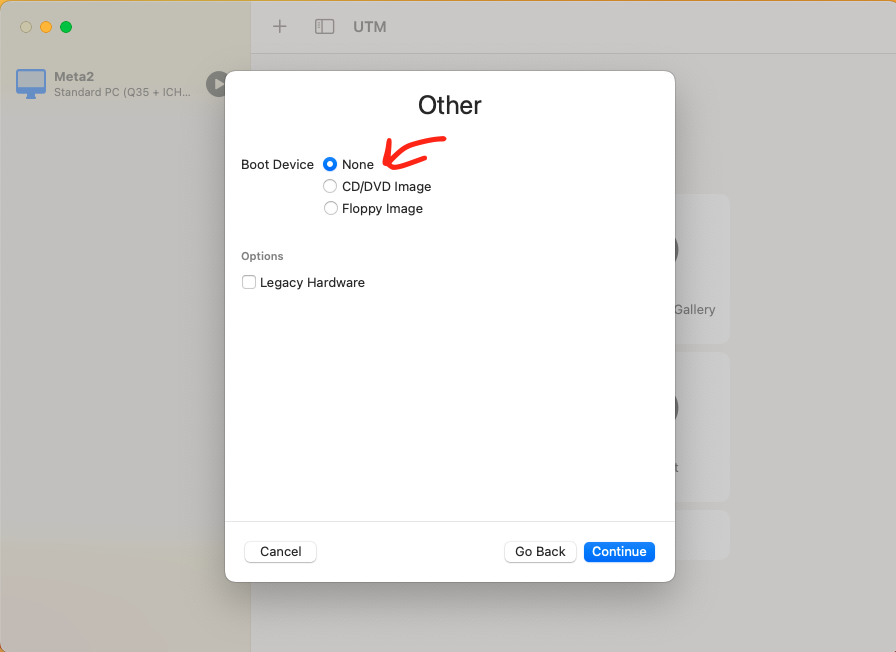
- Select Boot Device: None
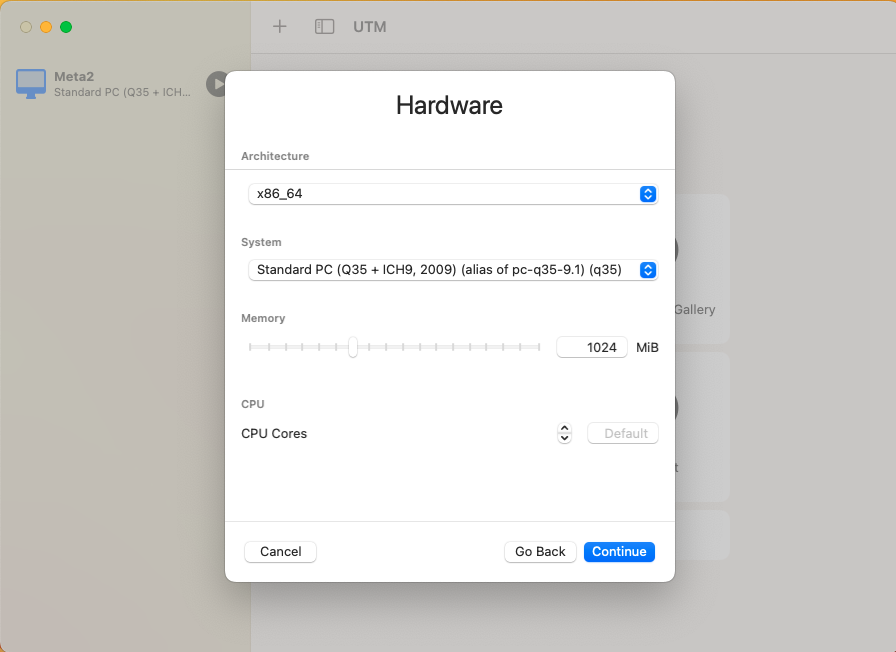
- Architecture: x86_64
- System: Leave default (or choose x86-compatible)
- Memory: 1024 MiB or more
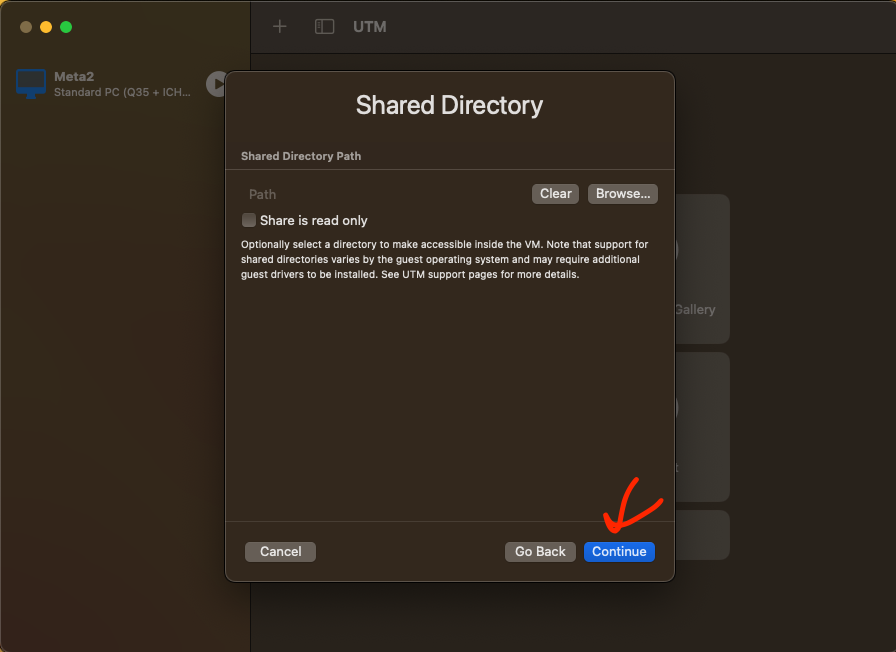
- Select Continue
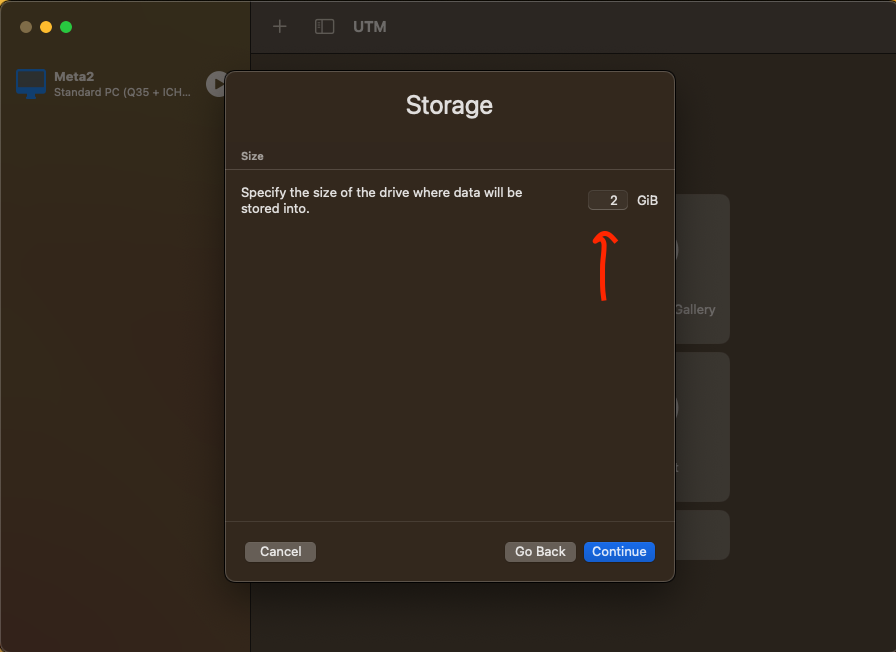
- Storage: 2 GiB
- Select Continue
- Select Continue
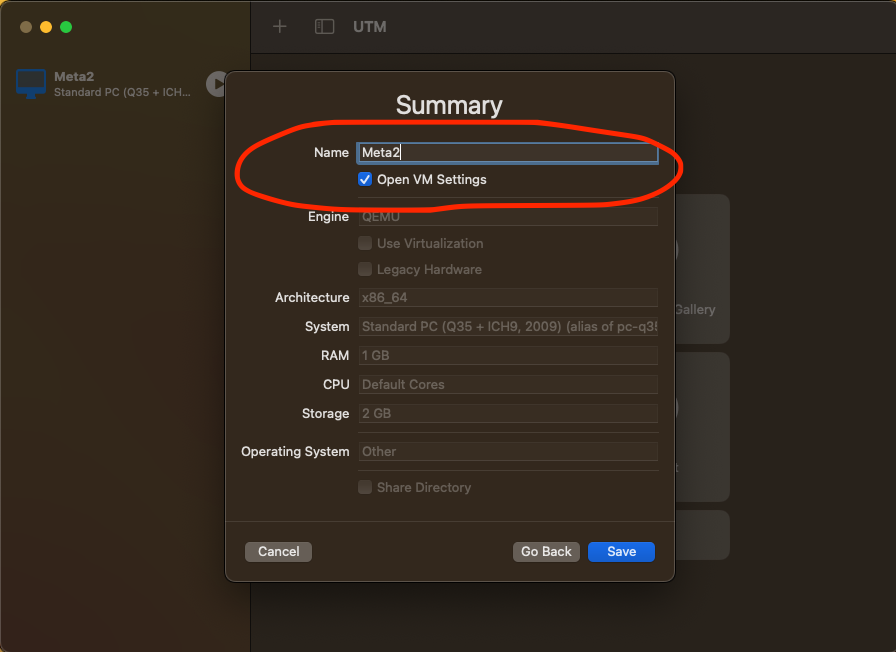
- Type Name: Metasploitable 2
- Check Open VM Settings
- Click Save
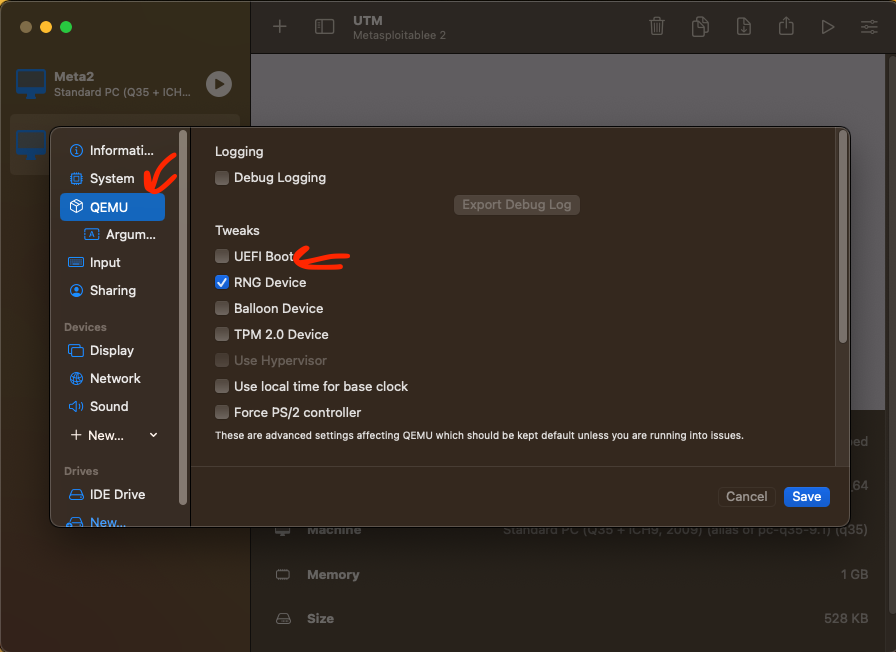
- Go to QEMU
- Uncheck UEFI Boot
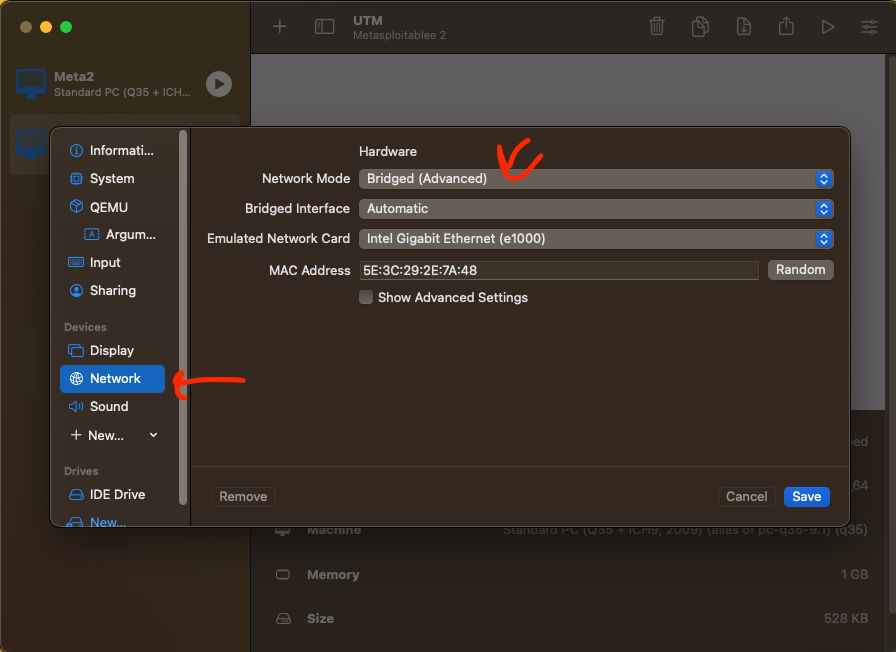
- Go to Network
- Set Network Mode: Bridged (Advanced)
📌 Important: Make sure your Kali Linux or other VM is also set to Bridged mode so it can communicate with Metasploitable 2 over the network.
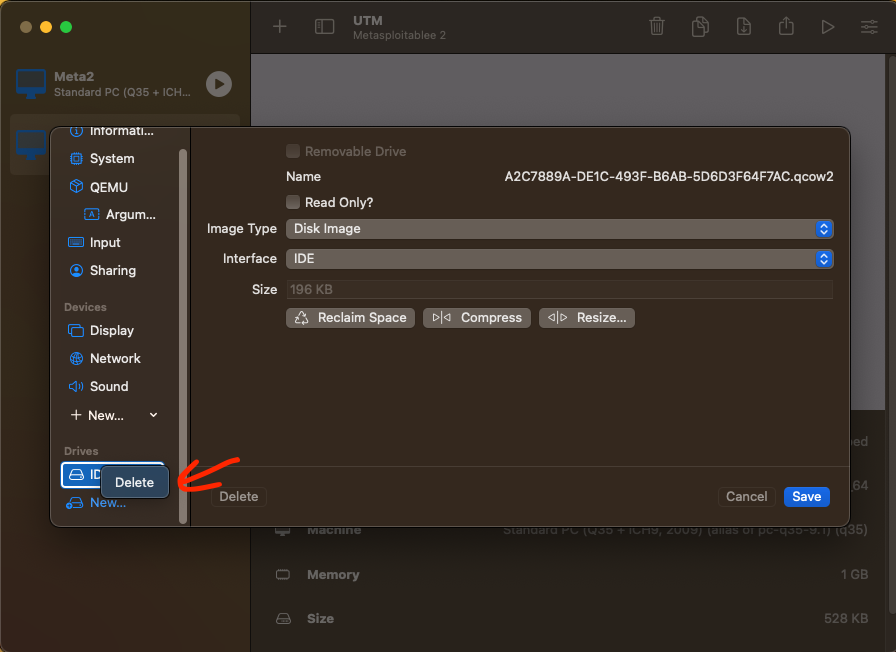
- Right Click and Delete IDE Drive
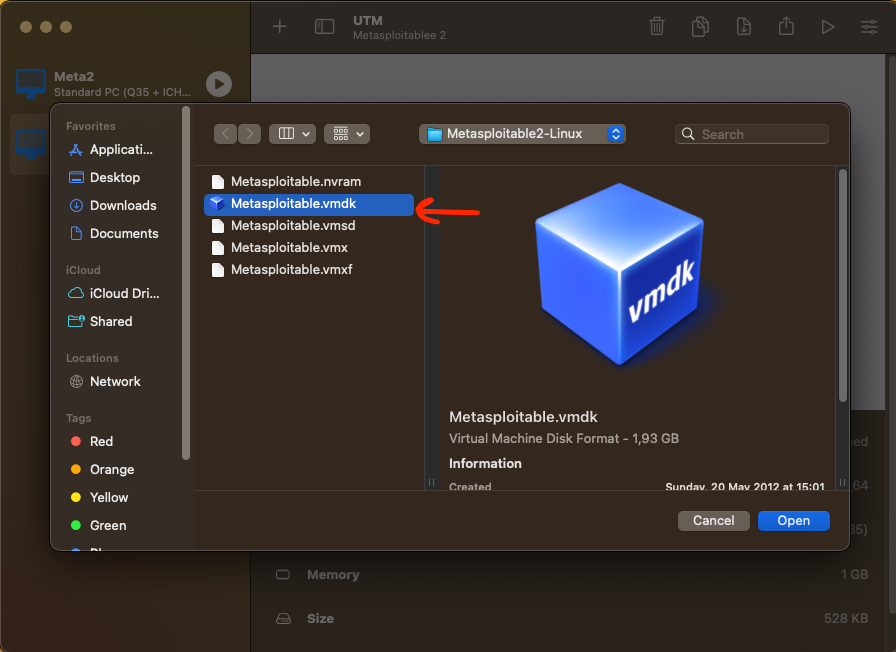
- Click New -> Import
- Choose file Metasploitable.vmdk (in the folder you unzip when download Metasploitable)
- Click Open
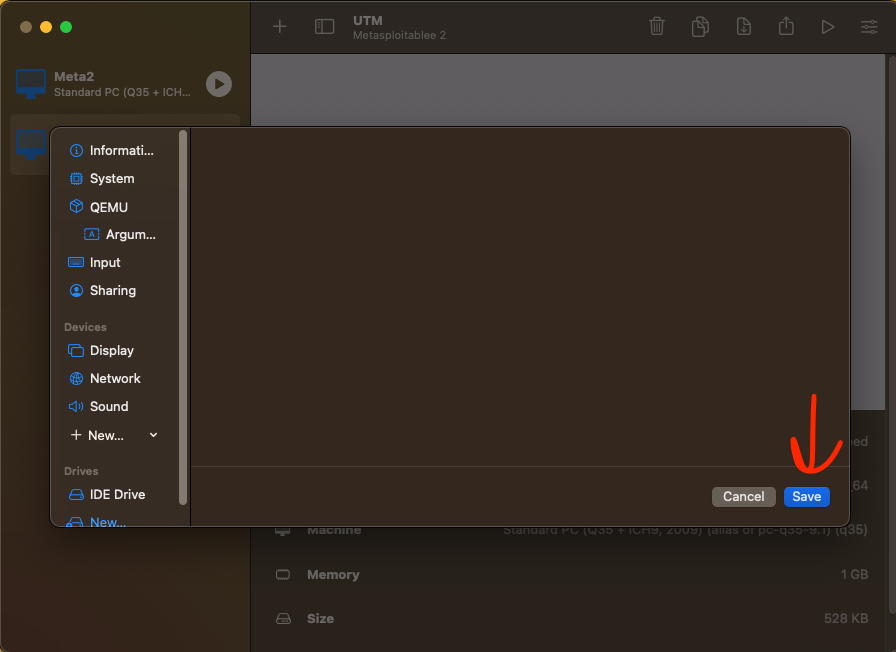
- Click Save and then you have successfully created your Metasploitable VM.
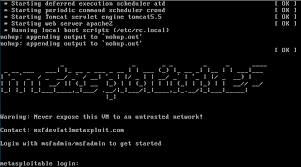
- Start your Metasploitable 2 machine
- Default credentials:
- Login: msfadmin
- Password: msfadmin
- To verify networking, run:
ifconfig
In order to see the IP address of your Metasploitable 2 VM.
Made by James Cao – cybersecurity & ethical hacking student.
Feel free to ⭐ the repo if it helped you!