Linux and MacOS
The QA402 software binaries are hosted on GitHub HERE. Theoretically, the images should run as-in on Linux and Mac under Mono. Most of the time, we’re used to downloading different images based on our platform (and sometimes there’s even an image for x32 and x64 machines). But the tools folks (Android, Java and DotNet) are working hard to make single image a real thing, from phones to desktop–it just all works with a single image. Now, that’s still some ways off (see MSFT MAUI for what is next up in the queue) but it’s helpful on background to understand where things are headed.
C# and DotNet and Mono enable most of this. And LibUSB is the other piece of the puzzle. On Windows, LibUsb relies on WinUSB. And with the QA402 and QA403, we’ve moved to a driverless install (the OS knows what to do based on advanced descriptors). And then for non-Windows platforms, LibUSB switches out the bottom half of the stack to whatever is needed and it just works.
If you’d like to try the QA40x software on Linux (and potentially MacOS), you can try the following steps:
Download the latest installation EXE from HERE. You will need to use a PC running Windows or potentially WINE to install the EXE and then copy the directory structure from the install location (usually C:\Program Files (x86)\QuantAsylum\QA40x) to your linux machine. The root of the install location contains the QA40x.exe application, and there are two directories (one titled UserWeighting and another titled Documentation) that are also needed.
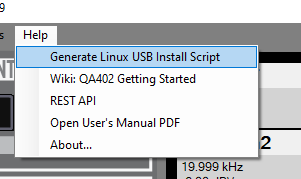
The application will generate the latest suggested install script via the Help-> Generate Linux USB Install Script as shown below.
The script from Release 1.149 is shown below. The steps involve installing Mono, installing LibUSB and making the USB VID:PID known to the OS. Depending on your platform, changes will probably be needed.
IMPORTANT: There are some issues related to updating the device firmware from Linux. If you are confronted with that option, note the current firmware version in the status bar of the application, decline the firmware update, and then switch to the latest release that supports that version of firmware (the firmware version for a given release is shown in the release notes for each version). That will ensure your new hardware can be run initially. Later, you can see the discussion related to permissions HERE and proceed accordingly.
IMPORTANT: The steps below are the most straightforward steps to getting the QA40x software running on Ubuntu 20.04 LTS. However, the defaults don't deliver the best experience. See the section below to see what is required.
# The steps needed to make the Audio Analyzer known to
# Linux are shown below. You might need to tweak
# depending on your platform. When a flash update is needed, the
# analyzer will re-attach to the system with a new VID:PID for the update.
#
# Install MONO
# See https://www.mono-project.com/docs/getting-started/install/linux/
# When you try to run the EXE, if you see a note that mono could not load windows.form, then
# you might need to explicitly specify:
# sudo apt-get install mono-complete
#
# Install LibUSB. This might be already installed. Alternately, you might need the dev build
# sudo apt-get install libusb-1.0-0
# sudo apt-get install libusb-1.0-0-dev
#
# Make the hardware known to the OS.
# The QA402 VID:PID is 0x16C0:4E37
# sudo sh -c 'echo "SUBSYSTEM ==\"usb\", ATTRS{idVendor}==\"16c0\", ATTRS{idProduct}==\"4e37\", MODE=\"0666\"" > /etc/udev/rules.d/51-qa402.rules'
# The QA403 VID:PID is 0x16C0:4E39
# sudo sh -c 'echo "SUBSYSTEM ==\"usb\", ATTRS{idVendor}==\"16c0\", ATTRS{idProduct}==\"4e39\", MODE=\"0666\"" > /etc/udev/rules.d/51-qa403.rules'
# The QA402 and QA403 use VID:PID of 0x1fc9:0x0022 when in bootloader mode
# sudo sh -c 'echo "SUBSYSTEM ==\"usb\", ATTRS{idVendor}==\"1fc9\", ATTRS{idProduct}==\"0022\", MODE=\"0666\"" > /etc/udev/rules.d/51-qa40xBootloader.rules'
# Review the file(s) we just wrote above
# cat /etc/udev/rules.d/51-qa402.rules
# cat /etc/udev/rules.d/51-qa403.rules
# cat /etc/udev/rules.d/51-qa40xBootloader.rules
# Tell the device manager to reparse the rules
# sudo udevadm control --reload-rules
There are several threads on the forum discussing Linux installs. Make sure to visit the forum HERE and search to see if others might have blazed a trail ahead of you for a particular variant. Especially relevant is the thread HERE where a user (@chris) was able to get the QA40x software running on a Rasberry Pi, but only with a x64 OS. The x32 sort-of worked for the ADC, but curiously, the DAC didn't work. The issue resolved with x64 OS.
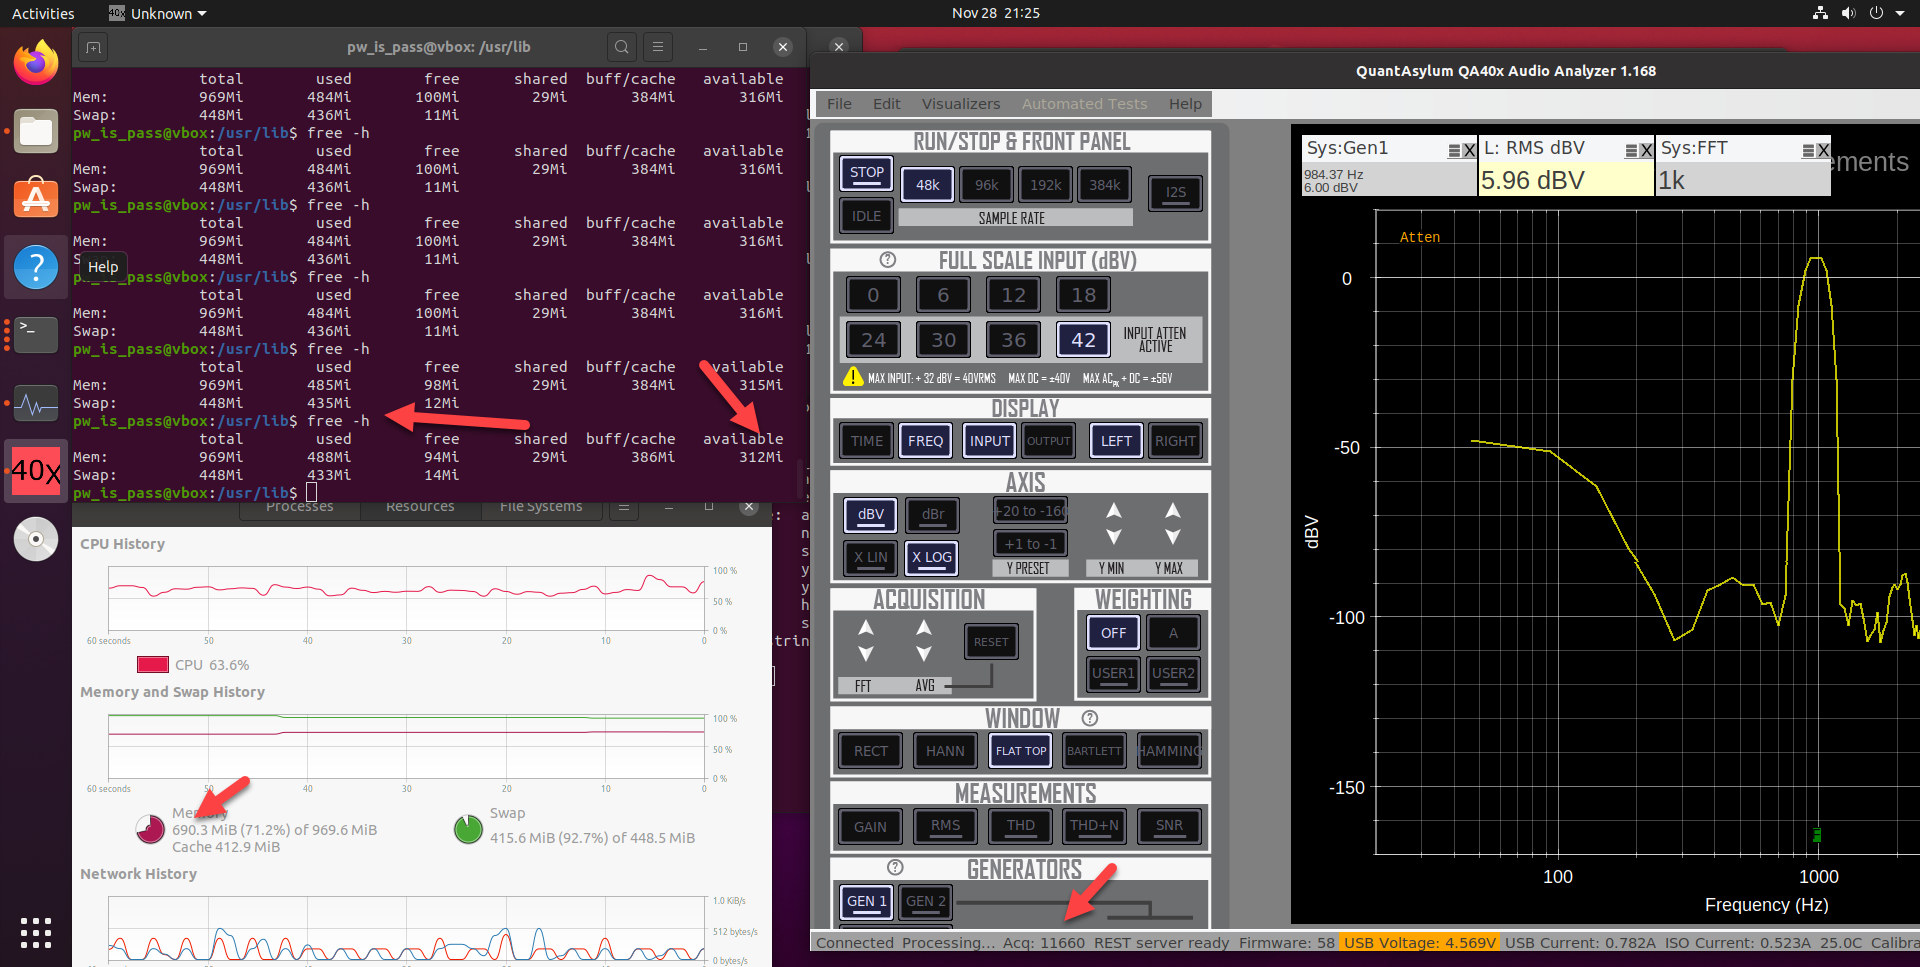
By default, Ubuntu 20.04 LTS will install Mono 6.8.0.105 when you enter the sudo apt-get install mono-complete command. This offers a good experience, but there have been significant performance improvements in Mono 6.12.0.182. There is a version of LibGdiPlus that is installed by default and used by Mono 6.8 and Mono 6.12--this version is 6.0.4. This version has a memory leak that will cap the number of total acquisitions to about 5000 or so. To see the leak in action, start the QA40x app, click the RUN button, and set the FFT size to 1K to run the acquisitions as fast as possible. And in another terminal (ctrl-alt-T) type free -h over and over and look at the far right column marked "available." When using version 6.0.4 of LibGdiPlus, you'll see the "available" count drop slowly but surely to nearly 0. At that point, the system is out of memory and will freeze. With version 6.0.5 of LibGdiPlus, the "available" memory drops a bit initially, and then remains mostly constant. Before we can update the LibGdiPlus component, we need to get the right version of Mono installed.
First, install Mono 6.12.0.182. If you've already installed the default Mono per the script above, you'll want to first remove that. First, type:
dpkg --list
Look for the entry mono-complete and verify it is there. Assuming it is, type sudo apt-get remove mono-complete to remove it.
The instructions for installing Mono 6.12 are outlined HERE. First, you need to add the Mono repo to your system (assuming 20.04 LTS):
sudo apt install gnupg ca-certificates
sudo apt-key adv --keyserver hkp://keyserver.ubuntu.com:80 --recv-keys 3FA7E0328081BFF6A14DA29AA6A19B38D3D831EF
echo "deb https://download.mono-project.com/repo/ubuntu stable-focal main" | sudo tee /etc/apt/sources.list.d/mono-official-stable.list
sudo apt update
Then install Mono:
sudo apt install mono-complete
With the new version of Mono in place, we can then work on update LibGdiPlus to avoid the leak. This is done by downloading and installing LibGdiPlus version 6.0.5. The details of this are outlined HERE. The steps and the details are at the link, but in short, you want to do the following:
- Download libgdiplus-6.0.5.tar.tz and decompress into a directory.
- Install needed dependencies:
sudo apt-get install libgif-dev autoconf libtool automake build-essential gettext libglib2.0-dev libcairo2-dev libtiff-dev libexif-dev - Switch to the directory containing the sources you decompressed. Type
./configure - Type
make - Install the library you just made with
sudo make install - Update the symbolic links originally installed by the mono-complete install:
cd /usr/lib
sudo rm libgdiplus.so
sudo rm libgdiplus.so.0
sudo ln -s /usr/local/lib/libgdiplus.so.0.0.0 libgdiplus.so
sudo ln -s /usr/local/lib/libgdiplus.so.0.0.0 libgdiplus.so.0
- Verify the version of LibGdiPlus is 6.0.5:
strings /usr/lib/libgdiplus.so | grep "6\.0\."
The screenshot below shows >10K acquisitions and the available memory remains mostly unchanged around 315M or so. Additional, we can watch the memory in System Monitor and also verify the system memory remains more or less constant.